In this post I will continue talking about the creation of the alleyway set. In my last post I showed how the basic wall structure and brick effect was made. Now I'll show how I added more details and finishing touches.
In the picture above you can see that there are a few more details added. A stage door was cut from MDF and painted purple. We used piano hinge to allow it to swing open. The steps under the door are also made from MDF and sprayed with a grey speckle paint ( like this one
LINK ). The spray paint gives a great stone texture and is much quicker than trying to create the effect by hand.
The door surround was cut from funky foam, sprayed with texture paint and stuck on with PVA glue. Next to the doorway is a mail shoot that the Mail Man will use to deliver a package into the theatre. The door for the shoot was cut from a sheet of aluminium. The handle and hinges are aluminium rod.
The picture above shows how the shoot opens. The stone frame for the shoot was made from funky foam in a similar way to the door. The only difference is the green corner sections that were sprayed with a different texture spray.
GARBAGE
In the design art you will notice that there are garbage cans, boxes and and other items in the alley way
LINK. These will help to dress the set and make things look more interesting. Because these are background items, I didn't want to spend too much time making them.
Most things are made from cheap materials and recycled parts. The trash cans are made from a thin plastic tray that held old paint brushes. The tray ways sprayed silver and wrapped around a plastic cup. The lids where made from funky foam and sprayed silver. The dumpster is made from foam board and another black plastic tray.
The garbage bags are made from garbage bags, wrapped and tied around scrunched up paper. Finally, the box was made from thin corrugated card. Most of these props wouldn't hold up well to scrutiny, but luckily they'll be in the background. They might look rubbish but hey, there meant to be garbage.
The Lamp
Above the stage door is a spherical lamp. It was a bit of a challenge trying to figure out how to make this match Josh's designs and function correctly. First I decided to power the lamp using a 9volt battery. The down side to using batteries is that they can run out of power during animation, resulting in the light getting dimmer and dimmer. Replacing the batteries mid shot would cause the light to suddenly get too bright and would be very noticeable in the final animation. To avoid this I will have to turn the light off between the time I take each photograph. this will conserve the battery power and give a steady glow of light in the animation.
Another alternative would be to power the light off the mains using a dc power adapter with the correct voltage. I've done this before to power the headlights of the truck in
STUMPED.
For the bulb I used a small incandescent Christmas tree light.
Incandescent bulbs give a warm glow that matched the look we were hoping
for. LED's tend to give cooler colours.
The round cover for the
bulb is made from a ping pong ball. The bulb fits through a hole in the
top. The sphere and bulb are supported by aluminium wire and a milliput
wall mount. (both painted black)
The electrical wiring runs along
the aluminum wire and through the wall to the battery. The on/off switch
is located on the right hand side of the wall to give me easy access
while animating.
Above you can see all the parts assembled together. The door and mail shoot have text painted onto them using a stencil.
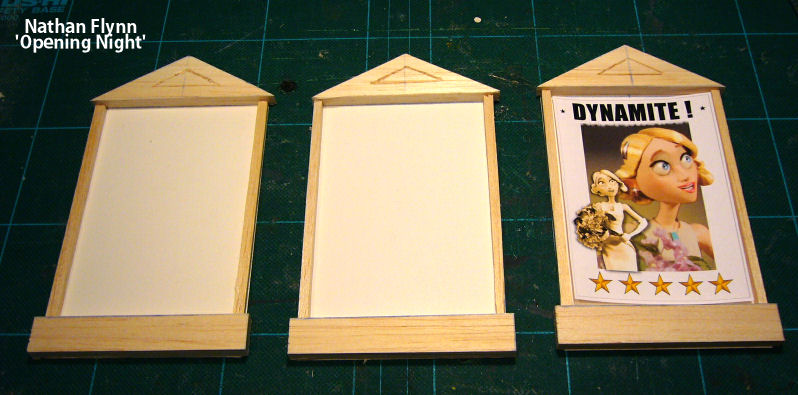
One of the final details to be added to this wall are some Theatre posters. Josh designed some nice little posters using some images of my Elle puppet. Above are the poster frames made from balsa wood.
Finally the balsa frames were painted red and the posters were stuck in place. these will be placed on the wall in the alleyway and in other locations around the theatre.
Recently I've been making new armatures for both the Elle (Actress) and Roy (Mail Man) puppets.
There's nothing wrong with the aluminium wire armatures that they currently have, but now that I've got a little more spare time, I've been getting creative and done something that I've wanted to do for a long time. So stay tuned to see how I've made full steel ball and socket armatures.